Are you interested in learning how to print your own t-shirt at home? There are two great methods for DIY t-shirt printing at home, simplified versions of the ones professionals employ. Read our post on screen printing here, or read on to learn about using the iron-on transfer method to print your own t-shirt.
Iron on Transfer to Print Your Own T-Shirt
The iron on transfer printing method is a simple, no-fuss and no mess way to apply a design or complex image to a t-shirt or other fabric. To print your own t-shirt only requires a design, a home or office printer, an iron, and something to print.
Step by Step Guide
(1) Choose the design
Any design, logo, or image can potentially be used to print your own t-shirt.
Make sure you only use designs and images of your own creation if you intend to sell the t-shirts.
Oddly shaped designs, rather than those in a box, will require more precise and difficult cutting. There is nothing wrong with this, just be prepared.
Your chosen design or image will either need to already be on the computer or you will have to upload it. Scan the physical photo or take a photograph of it to send it to the computer and then the printer.
(2) Purchase the transfer paper
Heat transfer paper can be purchased at stationery, craft, and office supply stores. You will need to choose from two types — one that transfers onto whites and pastels, and one that transfers onto other colours.
Transfer paper usually comes in the same dimensions as printer paper. If you don’t want that size, ensure your printer can handle the one you want.
(3) Mirror images for light-coloured t-shirts
Transfer paper designed for light-coloured fabrics creates a mirror image. To achieve the results you want, you will need to reverse or mirror the image before printing. Your printer may offer an option for this or you may need to edit the photo in a photo editor before printing.
Test the mirror image before printing onto a shirt by printing the image on regular printer paper. You can skip this step when printing on darker shirts.
(4) Print your design
Crop the photo if you only want to iron on a portion of the image.
Click preview to ensure your image will fit on the transfer paper. If it is too big, choose “fit to scale” in the printer’s menu or reduce the size of the image in a photo editor.
Choose “landscape” in your printing options if your photo is wider than it is tall.
Make sure your transfer paper doesn’t have a right and wrong side. One side may have a logo or be a slightly different colour or opacity than the other. Read the directions before proceeding to print your own t-shirt.
(5) Cut out the image
You must cut around the image exactly to ensure no blank transfer paper is left. If you try to iron on an image with excess paper, a shadow will be left on the t-shirt in the shape of the transfer paper. You can use a ruler and a craft knife to achieve a clean cut.
(6) Choose and cover the surface
Choose a table, countertop, or ironing board that is both smooth and able to withstand heat. Cover the surface with a cotton pillowcase to further protect both the surface and the t-shirt.
(7) Iron on
Follow ironing instructions on the transfer paper. If there are none, set the iron for “cotton” or “high” with dry heat and no steam. If your iron has water in it, pour it out to ensure no steam is produced.
Iron the shirt until it is completely flat before applying the design — you don’t want wrinkles printed into your design.
Place light transfer paper face down and dark transfer paper face up. Make sure the image is straight and in the correct position. Press the iron firmly onto the t-shirt, applying pressure with your whole hand. Move the iron as little as possible to maintain even, constant heat over the entire image. Your transfer paper should specify how long to iron — it may take anywhere from 30 seconds to a few minutes.
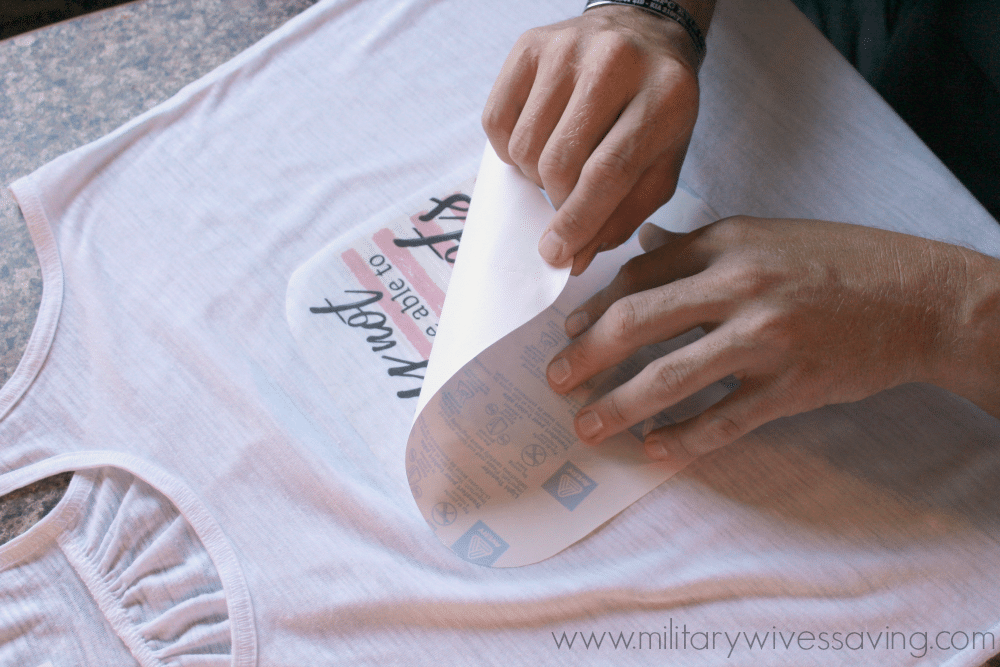
(8) Let it cool
Remove the iron and let the image and t-shirt cool for at least a few minutes until the paper feels room temperature. Peel off the paper. Congratulations — you’ve just printed your first shirt with the iron-on transfer method.
Pros and Cons of Iron on Transfer
Pros
- It’s really easy.
- It’s not messy.
- You don’t have to handle chemicals.
- You can print a complex design or image exactly as it appears.
Cons
- You will have to print a new transfer each time you want to print your own t-shirt.
- Iron-on designs last a long time, but not as long as screen printed ones.
Compare the iron-on transfer method to screen printing at home — find out more.
Ready for Professional Quality T-Shirt Printing?
Whilst DIY iron-on transfers are perfect for one-off projects and experimenting with designs, professional t-shirt printing offers significant advantages when you need quality, durability, and quantity.
Why Choose Professional T-Shirt Printing?
Superior Quality & Durability: Our professional printing methods deliver vibrant colours and crisp details that withstand hundreds of washes. Unlike iron-on transfers which can crack and fade, professionally printed shirts maintain their appearance for years.
Cost-Effective for Multiple Shirts: Once you’re printing more than a handful of shirts, professional printing becomes more economical. You’ll save time, avoid material costs, and get consistent results across all your garments.
Expert Guidance: Not sure which printing method suits your design? Our team will recommend the best technique for your specific needs — whether that’s screen printing for bold logos, DTG for photographic detail, embroidery for a premium finish, or transfer printing for full-colour designs and smaller runs.
Access to Premium Garments: Choose from our extensive catalogue of high-quality t-shirts, including eco-friendly options and sustainable materials.
Perfect For
- Business uniforms and corporate workwear
- Event merchandise and promotional giveaways
- Sports teams and club kit
- Influencer and content creator merchandise
- Charity fundraising campaigns
- Hen and stag party t-shirts
Frequently Asked Questions About T-Shirt Printing
How long do professionally printed t-shirts last compared to iron-on transfers?
Professional screen printing and DTG (Direct to Garment) printing typically last for hundreds of washes when cared for properly, maintaining vibrant colours and sharp details throughout the garment’s lifetime. Iron-on transfers generally start showing signs of cracking and fading after 20–30 washes. With professional printing, you’re investing in longevity and quality that far exceeds DIY methods.
What’s the minimum order quantity for professional t-shirt printing?
At Indigo Clothing, we don’t have a strict minimum order quantity. Whether you need 20 shirts for a small business or 1,000 for a major event, we can accommodate your requirements. The cost per shirt typically decreases with larger orders, but we’re happy to quote for any quantity.
Which printing method should I choose for my design?
The best printing method depends on your design complexity, quantity, and budget. Screen printing is ideal for bold designs with limited colours and larger quantities. DTG printing excels at photographic images and complex designs with multiple colours. Embroidery offers a premium, textured finish perfect for logos. Transfer printing works well for small runs with full-colour designs. Our team will recommend the optimal method when you request a quote.
How long does professional t-shirt printing take?
Turnaround times vary depending on the printing method, quantity, and current demand. Typically, we deliver most orders within 7–10 working days from artwork approval. Rush services are available for urgent requirements. We’ll provide an accurate timeline when you request your quote.
Can you help with design if I only have a rough idea?
Absolutely. We offer design services to help bring your vision to life. Whether you have a sketch, a logo file, or just a concept in mind, our team can work with you to create artwork that’s ready for printing. We’ll ensure your design looks great on the garments and meets all technical requirements for the printing process.
Do you offer eco-friendly t-shirt printing options?
Yes, sustainability is important to us. We offer a wide range of eco-friendly garments made from organic cotton, recycled materials, and sustainable fabrics. We also use water-based inks and environmentally responsible printing processes. Visit our eco-friendly products page to explore our sustainable options.